Stand-alone Camera software interface contains three main sections.(it may be different by the software update or special tools that is put for client’s need.)
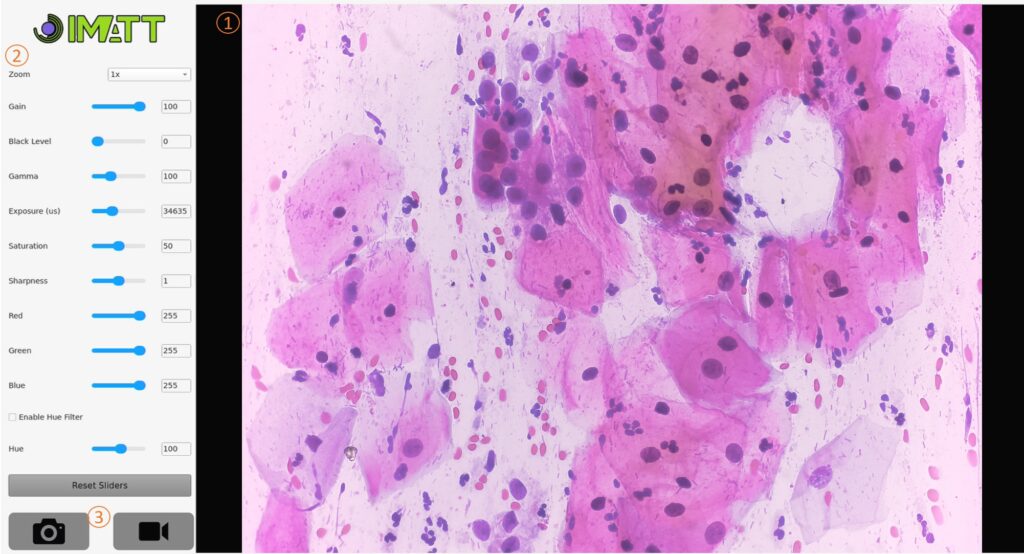
- Camera live image preview
- Image Adjust filters are listed you can use these tools to modify image quality shown on screen. any changes made by user will be saved and shown next time the camera software start. user can reset the filters value by clicking on Reset Sliders button, filters value will set as default.
- Image or Video Capturing: for capturing image or video first you must insert a flash drive into USB ports of camera. then a window will pop-up confirming that user flash drive is ready to capture, click OK. then click on icons of image capturing or video capturing. it will take a few moment to start capturing. after the capturing is completed a window will pop-up that image or video was captured and saved on user flash drive, click OK then continue. (if user’s flash drive was not connected or not recognized by camera, capturing will not occur and an error window will pop-up. an USB3 flash drive is recommended for reliable capturing and high speed data transfer.)
after the user is done with camera, double press or long press for 3 seconds on the power button of the camera ,the camera will Power OFF, there is no need to unplug the Power Cable. to Power ON the camera just one press on the power button will Powering ON the camera.
for further help please contact technical support, Mr. Ali Taheri (+989379412699) on social media like Telegram or WhatsApp or Bale.